DevPi – Local repository for python modules.

Currently in the Lab, I’m no longer using this Repo for the Python modules. Our repo is now Nexus: https://devops-db.com/publishing-python-packages-to-a-private-pypi-repository-on-nexus/
In this topic, I want to show the installation of DevPi (https://github.com/devpi/devpi), which is a local, simple and lightweight repository for Python modules, just like the Registry, there are other more complete repositories, such as the Jfrog Community Edition, which I want to show you how to use in a next post. But because they are simple and light, they now work better.
What is the need for DevPi now? Soon I will finalize some more configurations between GitLab and Jenkins and create a simple pipeline, and from this pipeline I want to show how to use pythons for any task and these pythons, I intend to use modules that I create as needed. Obviously I’m not going to upload these modules to PiPy.org, so I need to somehow have them locally, so that I can install them as pip normally.
I will show two types of installation, one in a VM and the other creating a Docker image.
Already with an environment where Python3 is installed, install the devpi modules. Installation may take a while.
pip install devpi-server devpi-web devpi-clientNow, let’s start preparing the folders, configuration files, and service.
I will use a shell file to start devpi-server and a systemctl service to call this shell, this way, changes are easier, without needing the daemon-reload every time.
I will use a /work/devpi-data folder as the root of the service. In this folder, it is also necessary to run a command to init the DevPi settings and data folder (/work/devpi-data/data):
sudo adduser usr_devpi
sudo usermod usr_devpi -s /sbin/nologin
sudo mkdir -p /work/devpi-data/
devpi-init --serverdir /work/devpi-data/data

touch /var/log/devpi.log
sudo chown -R usr_devpi:usr_devpi /var/log/devpi.log
Create the shell script:
vi /work/devpi-data/start-devpi.sh

#!/bin/bash
devpi-server -c /work/devpi-data/config.yml --logger-cfg /work/devpi-data/logger.yamlchmod u+x /work/devpi-data/start-devpi.sh
Create the service file:
vi /etc/systemd/system/devpi.service

[Unit]
Description=Devpi Server
Requires=network-online.target
After=network-online.target

[Service]
Restart=on-success
# ExecStart:
# - shall point to existing devpi-server executable
# - shall not use the deprecated `--start`. We want the devpi-server to start in foreground
ExecStart=/work/devpi-data/start-devpi.sh
# set User according to user which is able to run the devpi-server
User=usr_devpi

[Install]
WantedBy=multi-user.targetNow let’s create the configuration file. Note that the host has the listener as 0.0.0.0 and port 4040.
vi /work/devpi-data/config.yml
devpi-server:
    host: 0.0.0.0
    port: 4040
    role: standalone
    serverdir: /work/devpi-data/data
restrict-modify: rootAnd now the file that will create the logs, both in the /var/log folder and in stdout.
vi /work/devpi-data/logger.yaml

version: 1
formatters:
    simple:
        format: '%(asctime)s - %(name)s - %(levelname)s - %(message)s'
        datefmt: '%Y-%m-%d %H:%M:%S'

handlers:
    console:
        class: logging.StreamHandler
        level: DEBUG
        formatter: simple
        stream: ext://sys.stdout
    file:
        class: logging.FileHandler
        level: INFO
        formatter: simple
        filename: '/var/log/devpi.log'
        mode: a

loggers:
    development:
        level: DEBUG
        handlers: [console]
        propagate: no

    staging:
        level: INFO
        handlers: [console, file]
        propagate: no

    production:
        level: WARNING
        handlers: [file]
        propagate: no

root:
    level: DEBUG
handlers: [console,file]With everything ready, let’s start the service:
sudo chown -R usr_devpi:usr_devpi /work/devpi-data/

sudo systemctl start devpi

systemctl status devpi

● devpi.service - Devpi Server
     Loaded: loaded (/etc/systemd/system/devpi.service; enabled; vendor preset: enabled)
     Active: active (running) since Tue 2024-04-23 23:13:57 UTC; 2s ago
   Main PID: 2939 (start-devpi.sh)
      Tasks: 4 (limit: 2191)
     Memory: 559.2M
        CPU: 4.224s
     CGroup: /system.slice/devpi.service
             ├─2939 /bin/bash /work/devpi-data/start-devpi.sh
             └─2940 /usr/bin/python3 /usr/local/bin/devpi-server -c /work/devpi-data/config.yml --logger-cfg /work/devpi-data/logger.yaml

Apr 23 23:13:58 srv-vmware-01 start-devpi.sh[2940]: 2024-04-23 23:13:58 - root - INFO - NOCTX Loading node info from /work/devpi-data/data/.nodeinfo
Apr 23 23:13:58 srv-vmware-01 start-devpi.sh[2940]: 2024-04-23 23:13:58 - root - INFO - NOCTX wrote nodeinfo to: /work/devpi-data/data/.nodeinfo
Apr 23 23:13:58 srv-vmware-01 start-devpi.sh[2940]: 2024-04-23 23:13:58 - root - DEBUG - [Rtx0] closing transaction at 0
Apr 23 23:13:58 srv-vmware-01 start-devpi.sh[2940]: 2024-04-23 23:13:58 - root - INFO - NOCTX running with role 'standalone'
Apr 23 23:13:58 srv-vmware-01 start-devpi.sh[2940]: 2024-04-23 23:13:58 - root - DEBUG - NOCTX creating application in process 2940
Apr 23 23:13:58 srv-vmware-01 start-devpi.sh[2940]: 2024-04-23 23:13:58 - root - WARNING - NOCTX No secret file provided, creating a new random secret. Login tokens issued before are invalid. Use --secretfile option to provide a persistent secret. You can create a proper secret with the devpi-gen-secret command.
If the service is running well, you will be able to open the DevPi web page: http://127.0.0.1:4040/
Or as in my case, http://172.21.5.160:4040/ once I’m done, I must create a DNS for this entry.
Here we will create a simple image, based on Ubuntu 22, with the basic DevPi installations
We have a Dockerfile and a shell for the startup… the configuration files will be attached to the container when we create it.
Dockerfile
FROM ubuntu:22.04

ENV WORKDIR /work/devpi-data/
RUN mkdir -p ${WORKDIR}
WORKDIR ${WORKDIR}

# install dependencies
RUN apt update \
    && apt install -y python3 python3-pip

RUN pip3 install devpi-server devpi-web devpi-client

RUN devpi-init --serverdir /work/devpi-data/data

# Auto-Start service
COPY startup.sh ${WORKDIR}
RUN chmod +x startup.sh
WORKDIR ${WORKDIR}
ENTRYPOINT ./startup.shstartup.sh
#!/bin/bash
devpi-server -c /work/devpi-data/config.yml --logger-cfg /work/devpi-data/logger.yamlHaving the above files ready, let’s create the image:
docker image build --rm --no-cache -t img_devpi:latest .After the image is created, validate that it is already available.
docker image ls
REPOSITORY                                          TAG                    IMAGE ID       CREATED         SIZE
img_devpi                                           latest                 34a6a7f64237   6 minutes ago   515MB
Take advantage, if you have the Registry environment ready and upload the image to the repository.
But, with the image ready, let’s create the configuration files.
config.yml
devpi-server:
    host: 0.0.0.0
    port: 4040
    role: standalone
    serverdir: /work/devpi-data/data
    restrict-modify: root
logger.yaml
version: 1
formatters:
    simple:
        format: '%(asctime)s - %(name)s - %(levelname)s - %(message)s'
        datefmt: '%Y-%m-%d %H:%M:%S'

handlers:
    console:
        class: logging.StreamHandler
        level: DEBUG
        formatter: simple
        stream: ext://sys.stdout
    file:
        class: logging.FileHandler
        level: INFO
        formatter: simple
        filename: '/var/log/devpi.log'
        mode: a

loggers:
    development:
        level: DEBUG
        handlers: [console]
        propagate: no

    staging:
        level: INFO
        handlers: [console, file]
        propagate: no

    production:
        level: WARNING
        handlers: [file]
        propagate: no

root:
    level: DEBUG
handlers: [console,file]Create the container:
docker run -tid -p 4040:4040 \
   --network local-bridge \
   -v /work/DevPi/config.yml:/work/devpi-data/config.yml \
   -v /work/DevPi/logger.yaml:/work/devpi-data/logger.yaml \
   --name srv-devpi-01 img_devpi:latest
From now on, the configuration is the same
Internal structure.
For this service, I will not create integration with LDAP, it will be simple authentication.
In the next steps, from within the host/vm/container where DevPi is installed, we will create the basic authentication user and the Index structure for the modules that will be hosted on DevPi.
For the commands from now on, I will use the IP I created, remember to change it.
Connect to the server and log in with root.
devpi use http://172.21.5.160:4040

devpi login root --password ''
logged in 'root', credentials valid for 10.00 hoursChange the root password
devpi user -m root password=1234qwer

/root changing password: ********
user modified: root
Let’s create a basic authentication user and create an index using it as root.
devpi user -c devpi_devopsdb

new password for user devpi_devopsdb:
repeat new password for user devpi_devopsdb:
user created: devpi_devopsdb
devpi index -c devpi_devopsdb/stable bases=root/pypi volatile=True

http://172.21.5.160:4040/devpi_devopsdb/stable?no_projects=:
  type=stage
  bases=root/pypi
  volatile=True
  acl_upload=devpi_devopsdb
  acl_toxresult_upload=:ANONYMOUS:
  mirror_whitelist=
mirror_whitelist_inheritance=intersectionLogout of user root:
devpi logoff
login information deleted
Example module.
I’m going to leave here a very simple structure of a python module, so we can test the push/upload and use of this module on another host. This can be created in any other environment, it does not need to and should not be created within the DevPi Server.
The python module is simple, two functions and nothing more:
.
├── ip_number
│   ├── __init__.py
│   └── ipnumber.py
└── setup.py
__init__.py
__version__ = '1.0.0'
from .ipnumber import fn_IP_Int
from .ipnumber import fn_Int_IPipnumber.py
"""
Module to convert IPs into Numbers and Numbers into IPs.
"""

def fn_IP_Int(ip):
    h = list(map(int, ip.split(".")))
    return (h[0] << 24) + (h[1] << 16) + (h[2] << 8) + (h[3] << 0)

def fn_Int_IP(ip):
    return ".".join(map(str, [((ip >> 24) & 0xff), ((ip >> 16) & 0xff), ((ip >> 8) & 0xff), ((ip >> 0) & 0xff)]))
setup.py
from setuptools import setup, find_packages

VERSION = '1.0.0'
DESCRIPTION = 'Convert IP to Int'
LONG_DESCRIPTION = 'Module to convert IPs into Numbers and Numbers into IPs.'

# Setting up
setup(
       # the name must match the folder name 'ip_number'
        name="ip_number",
        version=VERSION,
        author="You",
        author_email="your.email@gmail.com",
        description=DESCRIPTION,
        long_description=LONG_DESCRIPTION,
        packages=find_packages(),
        install_requires=[],
)After the entire structure is ready, in the same folder where setup.py is located, we need to run setup so that the WHL and Tar.GZ files, necessary for uploading to DevPi, are created.
There are also other ways to create this wheels structure, I prefer to use setup.py, it’s simpler.
Let’s prepare the environment for the setup, first it is necessary to install the modules that will be used in the setup:
pip install setuptools wheel devpi-clientSo now, in the same folder as setup.py:
python setup.py sdist bdist_wheel

running sdist
running egg_info
creating ip_number.egg-info
writing ip_number.egg-info/PKG-INFO
[...]
adding 'ip_number-1.0.0.dist-info/top_level.txt'
adding 'ip_number-1.0.0.dist-info/RECORD'
removing build/bdist.macosx-13.5-arm64/wheelOkay, now you should notice that the folder structure has become much larger.
.
├── build
│   ├── bdist.macosx-13.5-arm64
│   └── lib
│       └── ip_number
│           ├── __init__.py
│           └── ipnumber.py
├── dist
│   ├── ip_number-1.0.0-py3-none-any.whl
│   └── ip_number-1.0.0.tar.gz
├── ip_number
│   ├── __init__.py
│   └── ipnumber.py
├── ip_number.egg-info
│   ├── PKG-INFO
│   ├── SOURCES.txt
│   ├── dependency_links.txt
│   └── top_level.txt
└── setup.pyModule push.
Now, with the entire structure ready, it’s time to upload it.
The host you are uploading to must have the devpi-client module installed.
pip install devpi-clientStay in the same setup.py folder. We need to log in to DevPi with the same user that we created the index in the first configurations and then select the same index.
$ devpi use http://172.21.5.160:4040

Warning: insecure http host, trusted-host will be set for pip
using server: http://172.21.5.160:4040/ (not logged in)
no current index: type 'devpi use -l' to discover indices
/work/DevPi/.config/pip/pip.conf: no config file exists
/work/DevPi/.pydistutils.cfg: no config file exists
/work/DevPi/.buildout/default.cfg: no config file exists
always-set-cfg: no

###

$ devpi login devpi_devopsdb --password '1234qwer'

logged in 'devpi_devopsdb', credentials valid for 10.00 hours

###
$ devpi use stable

Warning: insecure http host, trusted-host will be set for pip
current devpi index: http://172.21.5.160:4040/devpi_devopsdb/stable (logged in as devpi_devopsdb)
supported features: server-keyvalue-parsing
/work/DevPi/.config/pip/pip.conf: no config file exists
/work/DevPi/.pydistutils.cfg: no config file exists
/work/DevPi/.buildout/default.cfg: no config file exists
always-set-cfg: no
So, let’s upload the dist folder that was created in setup.
$ devpi upload --sdist --wheel --from-dir dist

file_upload of ip_number-1.0.0-py3-none-any.whl to http://172.21.5.160:4040/devpi_devopsdb/stable/
file_upload of ip_number-1.0.0.tar.gz to http://172.21.5.160:4040/devpi_devopsdb/stable/
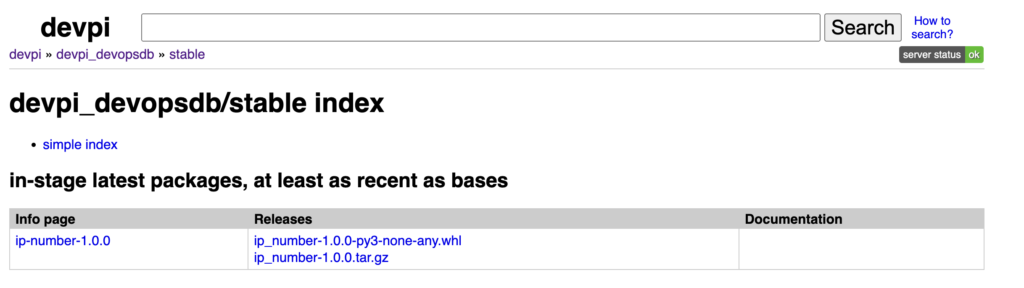
You can check in the GUI, the package should already be there.
Using the module.
Now, to test, use a different host, one that has Python and nothing else from DevPi.
You can now configure Pip to directly retrieve any request from your DevPi, such as creating pip.conf with index-url and extra-index-url, having the DevPi address directly in the url, having a pip alternative .conf, etc, etc, etc.
Now, for demonstration purposes, I will make the call directly in pip, later on, I will create an image with this pip.conf.
Validate that the module is not actually installed:
python

>>> import ip_number
Traceback (most recent call last):
  File "<stdin>", line 1, in <module>
ModuleNotFoundError: No module named 'ip_number'
Install using pip and providing the DevPi address.
$ pip install -i http://172.21.5.160:4040/devpi_devopsdb/stable/ ip_number --trusted-host 172.21.5.160

Looking in indexes: http://172.21.5.160:4040/devpi_devopsdb/stable/
Collecting ip_number
  Downloading http://172.21.5.160:4040/devpi_devopsdb/stable/+f/adc/ec1038aab9861/ip_number-1.0.0-py3-none-any.whl
Installing collected packages: ip-number
Successfully installed ip-number-1.0.0
Test again
import ip_number

var_ip = ip_number.fn_IP_Int('10.124.44.140')
print(var_ip)

var_number = ip_number.fn_Int_IP(var_ip)
print(var_number)
Done… quickly and easily, you have a repository / artifactory of python modules locally.
DNS:
nslookup devpi.devops-db.internal
Server:         172.21.5.72
Address:        172.21.5.72#53

Name:   devpi.devops-db.internal
Address: 172.21.5.160pip.conf.
Another way to install the module is to have a pip configuration file, it can be in the default paths, but I prefer to have a normal conf file and indicate its use at the time of execution or set the PIP_CONFIG_FILE environment variable.
For example. Create the pip-devops.conf file in any path, in the example /work/conf-files/pip-devops.conf
[global]
index-url = http://devpi.devops-db.internal:4040/devpi_devopsdb/stable
trusted-host = devpi.devops-db.internalAnd then the pip install call looks like this:
PIP_CONFIG_FILE=/work/conf-files/pip-devops.conf pip install devopsdb


