Elasticsearch / Kibana – Instalation
In this post, I’ll show you how to perform a simple installation of Elasticsearch and Kibana on the same VM. Of course, you can create both in Kubernetes, for example, but I prefer to do it in a VM.
Elasticsearch:
Elasticsearch is a distributed search and analytics engine designed to store, search, and analyze large volumes of data in near real-time. It powers fast full-text search, structured queries, and analytics across diverse datasets.
Kibana:
Kibana is a data visualization and exploration tool for Elasticsearch. It allows users to create dashboards, charts, and reports, making it easy to analyze and monitor data stored in Elasticsearch.
The VM I created has 2Gb of memory (Ubuntu), less than that and it gets very busy. It has a fixed IP of 172.21.5.161 and I created a DNS entry for elasticsearch.devops-db.internal.
Installation is super simple. First, I do some basic installations on the VM, as I prefer.
apt update
apt upgrade -y

apt install -y wget net-tools lsb-release vim curl less iputils-ping ssh dnsutils jq apt-transport-https


wget -qO - https://artifacts.elastic.co/GPG-KEY-elasticsearch | sudo gpg --dearmor -o /usr/share/keyrings/elasticsearch-keyring.gpg
echo "deb [signed-by=/usr/share/keyrings/elasticsearch-keyring.gpg] https://artifacts.elastic.co/packages/8.x/apt stable main" | sudo tee /etc/apt/sources.list.d/elastic-8.x.list

sudo apt update
sudo apt install elasticsearch -y

sudo systemctl enable elasticsearch
sudo systemctl start elasticsearch
After a while, pay close attention to a “Security Autoconfiguration Information” message. It will contain some important information, most notably the elastic (root) user password.
--------------------------- Security autoconfiguration information ------------------------------

Authentication and authorization are enabled.
TLS for the transport and HTTP layers is enabled and configured.

The generated password for the elastic built-in superuser is : 3G+oOq0T_9tZ7oZM32d-

If this node should join an existing cluster, you can reconfigure this with
'/usr/share/elasticsearch/bin/elasticsearch-reconfigure-node --enrollment-token <token-here>'
after creating an enrollment token on your existing cluster.

You can complete the following actions at any time:

Reset the password of the elastic built-in superuser with
'/usr/share/elasticsearch/bin/elasticsearch-reset-password -u elastic'.

Generate an enrollment token for Kibana instances with
 '/usr/share/elasticsearch/bin/elasticsearch-create-enrollment-token -s kibana'.

Generate an enrollment token for Elasticsearch nodes with
'/usr/share/elasticsearch/bin/elasticsearch-create-enrollment-token -s node'.
Perfect, in our case the elastic user has the password: 3G+oOq0T_9tZ7oZM32d-
After a few seconds/minutes, we will validate if the elastic is up.
curl -k -u elastic:3G+oOq0T_9tZ7oZM32d- https://elasticsearch.devops-db.internal:9200
{
  "name" : "srv-infrastructure-elastic-master-01",
  "cluster_name" : "elasticsearch",
  "cluster_uuid" : "Pc_atE3YQwezsZ6CUMfvXA",
  "version" : {
    "number" : "8.19.4",
    "build_flavor" : "default",
    "build_type" : "deb",
    "build_hash" : "aa0a7826e719b392e7782716b323c4fb8fa3b392",
    "build_date" : "2025-09-16T22:06:03.940754111Z",
    "build_snapshot" : false,
    "lucene_version" : "9.12.2",
    "minimum_wire_compatibility_version" : "7.17.0",
    "minimum_index_compatibility_version" : "7.0.0"
  },
  "tagline" : "You Know, for Search"
}
Before installing Kibana, let’s “create” a password for the user we’ll be using. The kibana_system user is already created automatically when you install Elasticsearch.
curl -k -u elastic:3G+oOq0T_9tZ7oZM32d- -X PUT "https://elasticsearch.devops-db.internal:9200/_security/user/kibana_system/_password" -H "Content-Type: application/json" -d '{
  "password": "1234qwer"
}'
All set, let’s install Kibana:
apt -y install kibanaWhen the installation is finished, we have to configure kibana, don’t forget that Elasticsearch is using SSL (https) but I don’t have a valid certificate, so I have to use elasticsearch.ssl.verificationMode: none.
vi /etc/kibana/kibana.yml


server.host: "0.0.0.0"
server.port: 5601
elasticsearch.hosts: ["https://elasticsearch.devops-db.internal:9200"]
elasticsearch.ssl.verificationMode: none
elasticsearch.username: "kibana_system"
elasticsearch.password: "1234qwer"
All set, start the service:
sudo systemctl enable kibana
sudo systemctl restart kibana
sudo systemctl status kibana
If you want, follow the log..
sudo journalctl -u kibana -n 50 --no-pagerGiving Elasticsearch as a Kibana has many more configurations, including security, but I leave here only the simple installation.
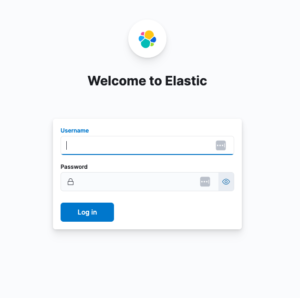
https://elasticsearch.devops-db.internal:5601
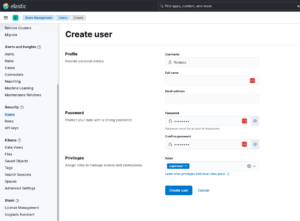
IIn my case, I logged in with the elastic user (root) and immediately created a user for myself. For this lab I’m using the OSS/Basic version and LDAP authentication on those versions doesn’t work: https://www.elastic.co/subscriptions
Stack Management / User / Create:
In the next posts I will show 2 examples of how to export logs to Elastic using Filebeat.