Nexus – Installation
Hello, after some time using Registry for Docker images and DevPy for Python modules, because they were simpler, lighter, and easier to maintain, I finally needed a more robust, open-source tool. I was really torn between Harbor and Nexus. I opted for Nexus, also because of the variety of repository types it can create and its widespread use in the market.
I’ll show you a simple installation using Kubernetes (MicroK8s).
The files with the yamls for deploying Nexus are on our GitHub: https://github.com/faustobranco/devops-db/tree/master/nexus
Installation
What I’m going to do is deploy Nexus on the MicroK8s we use in this project, with an ingress to the URL: http://nexus.devops-db.internal/
This URL is already registered in our DNS: https://devops-db.com/bind9-dns/
First important point, check if you have an Ingress in your K8s, in our case, in Microk8s, I needed to enable the ingress.
microk8s enable ingress

Enabling Ingress
ingressclass.networking.k8s.io/public created
ingressclass.networking.k8s.io/nginx created
namespace/ingress created
serviceaccount/nginx-ingress-microk8s-serviceaccount created
clusterrole.rbac.authorization.k8s.io/nginx-ingress-microk8s-clusterrole created
role.rbac.authorization.k8s.io/nginx-ingress-microk8s-role created
clusterrolebinding.rbac.authorization.k8s.io/nginx-ingress-microk8s created
rolebinding.rbac.authorization.k8s.io/nginx-ingress-microk8s created
configmap/nginx-load-balancer-microk8s-conf created
configmap/nginx-ingress-tcp-microk8s-conf created
configmap/nginx-ingress-udp-microk8s-conf created
daemonset.apps/nginx-ingress-microk8s-controller created
Ingress is enabled
After that, I’ll create the paths for the yaml files and the PV (hostPath) we’ll create.
The files and folders require special permissions. To avoid mixing files, I’ll use /work/nexus/data for the PV.
sudo mkdir -p /work/nexus/data
sudo mkdir -p /work/nexus/yamls

sudo chown -R 200:200 /work/nexus/data
sudo chmod -R 700 /work/nexus/dataApply the yamls files (Indicated above on our GitHub).
I didn’t create specific namespaces, nothing… I left it as simple as possible, so the customization is up to you.
kubectl apply -f nexus-pv.yaml
kubectl apply -f nexus-pvc.yaml
kubectl apply -f nexus-deployment.yaml
kubectl apply -f nexus-service.yaml
kubectl apply -f nexus-ingress.yaml
Check the Pod:
kubectl get pods -l app=nexus
NAME                     READY   STATUS    RESTARTS   AGE
nexus-5f77b5b665-c6dx7   1/1     Running   0          5m17s
For the first access, we need to use the admin user and the password is generated during installation, in a file inside the POD.
kubectl exec -it nexus-5f77b5b665-c6dx7 -- cat /nexus-data/admin.password
4a28875f-8857-4a39-9c67-4390e85897e6Ok, if everything went well, your ingress is configured correctly, just access the url. http://nexus.devops-db.internal/
During your first login, you’ll be asked to change your Admin password and choose whether to enable or disable anonymous access. I chose to disable it.
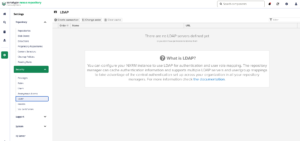
LDAP Integration
The first step in the configuration I want to do is the integration with our LDAP. https://devops-db.com/category/laboratory/openldap/
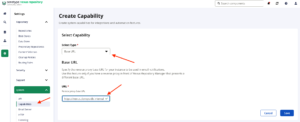
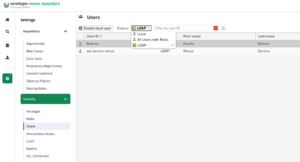
First, with a user who has administrator permissions, go to Settings, Security and choose LDAP.
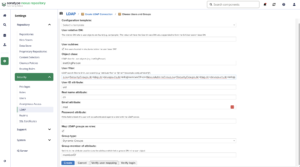
On the first screen, we need to configure the basic information for our LDAP server.
P.S. You’ll see that I’m not using the LDAP protocol in the configuration, as our certificate has expired, and I’m preparing another post about this.
| Name | Value | Comments |
|---|---|---|
| Name | DevOps-DB (NexusUserGroup) | The name doesn’t matter, choose yours. |
| LDAP server address | ldap://ldap.devops-db.info389 | |
| Search base DN | dc=ldap,dc=devops-db,dc=info | This is the search base, the root of where users, groups, etc. are in your LDAP. |
| Authentication Method | Simple Authentication | |
| Username or DN | cn=readonly-bind-dn,ou=ServiceGroups,dc=ldap,dc=devops-db,dc=info | User that will be used in user search, we create a readonly bind. |
| Password | 1234qwer |
The important thing is that if everything is correct, when you click on Verify connection, the message in the upper right corner in green should appear.

Now, click Next and let’s move on to the rest of the settings.
| Name | Value | Comments |
|---|---|---|
| User subtree | checked | It’s very important to check this option; it indicates that the user search should follow the LDAP structure. If unchecked, the search will only be performed in the root folder. |
| Object class | inetOrgPerson | |
| User Filter | (&(objectClass=inetOrgPerson)(|(memberOf=cn=NexusUsersGroup,ou=SecurityGroups,dc=ldap,dc=devops-db,dc=info)(memberOf=cn=NexusAdminsGroup,ou=SecurityGroups,dc=ldap,dc=devops-db,dc=info))) | Another important point, for Nexus, I decided to create two groups in our LDAP, NexusUsersGroup for normal users and NexusAdminsGroup for Nexus Administrators, only those who are members of these groups will be able to use Nexus. |
| User ID Attribute | uid | |
| Real Name attribute | cn | |
| Email attribute | ||
| Group type | Dynamic Groups | |
| Group member of attribute | memberOf |
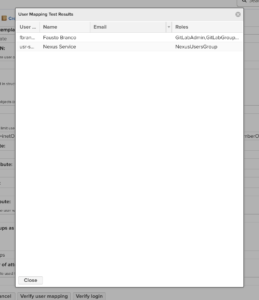
Click on Virify user mapping, and it should bring up all the users in the groups mentioned above. In my case, there were only two: mine and a user I created to compose the NexusUsersGroup group.
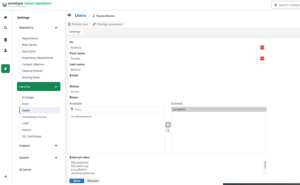
If everything is correct, save the changes and let’s configure an LDAP user as admin. To do this per LDAP group, I’ll write a separate post.
Installation
These two configurations are necessary for the repositories to function correctly.